Thursday, March 26, 2020

Soak Seeds Before You Start?

Is Soaking Seeds Before Planting Worth Your Time? How Do You Do It?
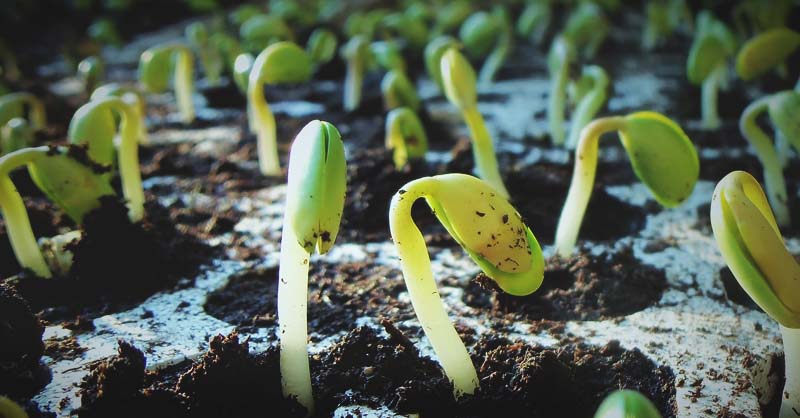


To soak your seeds or not soak your seeds prior to planting, that is the question…

Among gardeners, at least.

The short answer is that soaking seeds is a matter of personal preference, but I’m going to share with you why you should consider soaking them.

I’m also going to give you information on how to soak your seeds, the best seeds for soaking, and a few additional processes you can try when soaking.

Before you start putting too many seeds in the ground, take the time to review your research and make sure you give your garden what you feel is the best start.

Here’s what you should know about soaking seeds prior to planting:

Which Seeds Should (and Shouldn’t) I Soak?


All seeds aren’t created equally. You have some which are tiny and hard enough to handle when they’re dry and solid, such as carrots.

Yet, you have other seeds which are large and in charge. They’re big and have rough surfaces. These are the seeds which could benefit from a good soak before planting.


The seeds you don’t want to soak would be seeds like:

Carrots
Lettuce
Radish
Celery
Turnips
Spinach

Seeds which could benefit from being soaked would be:

Corn
Pumpkin
Beans
Chard
Beets
Peas

Why Soak My Seeds?

If you’re new to gardening, you may be wondering why even bother with soaking your seeds. The idea is to speed up the seed’s germination rate.

When seeds are in nature, they’re designed to be tough because the elements can be rough on a small seed.

Plus, seeds were designed to hold off on germination until the time is right. When soaking your seeds before planting, you’re doing many things:

1. Boosting Moisture Rate

Seeds know when it’s safe to germinate and when it isn’t. When you soak the seeds in water (or any liquid) it signals the moisture around them has increased.

Moisture is an indication which the seed needs, to know it’s okay to germinate, and they have a safe area to begin growing.

2. Removing the Protective Coating

Certain seeds have a protective coating around them. This coating is to stop the seeds from germinating when they live in the moist climate of the parent fruit.

When soaking the seeds, it gently removes this protective coating, and sends signals to the seed it’s outside of the parent fruit and free to start growing.


3. Softening the Seed

You soak your seeds because as the seed absorbs water, it begins to break down the outermost shell of the seed.

The shell is the hardest part of seeds because it’s meant to protect it. By soaking the seed, it enables the new growth from the inside to push through the hard shell and grow.

4. It’s Natural

In nature, seeds are frequently consumed by animals. Some of the best plants grow from animal scat. When soaking seeds, some people choose more acidic liquids.

Acidic fluids, as you would find with digestion, again aids in softening the shell. The seeds experience something similar to digestion and are encouraged to germinate and grow wonderfully.

How to Soak Your Seeds

You now know why you soak seeds and which seeds are the best fit for soaking. If you’re interested in trying this gardening technique, this is how you go about soaking your seeds:

1. Place Seeds in a Shallow Bowl

To begin soaking your seeds, place them in a shallow bowl. It doesn’t need to be deep because you’re going to cover them as you would beans you were presoaking for cooking.

Alternatively, consider placing the seeds into a plastic baggie. Put enough water in the bag to keep the seeds moist.

Once the seeds and water are in the bag, seal it. You can also allow seeds to rest between two wet paper towels; ensure to keep them constantly moist.

2. Choose Your Liquid

Once your seeds are in a shallow bowl, choose the liquid you’d like to soak them in. You can go with just water, or you can choose more acidic liquids like coffee or vinegar mixed with water

If you choose to add acidic liquids to the seeds, add approximately one tablespoon to the water you’re soaking the seeds in.

Also, if you warm the water the seeds soak in, this can speed up the germination process. Be sure the water is lukewarm and not hot, or it will cook them.


3. Let the Seeds Soak It All Up

You should allow the seeds to soak in the liquid for approximately 12 hours. If the water they’re soaking in is warm, it may take less time.

Keep an eye on the seeds because if they soak too long, they’ll begin to disintegrate. When the soaking is complete, it’s time to plant.  

4. Watch the Weather

Before soaking your seeds be sure to check the weather. Make sure you have a good day to plant after the seeds are finished soaking.

The reason being, once the seeds are done soaking, they’re ready to go into the ground. If you leave them waiting around to plant, they could easily begin to mold or rot.

Therefore, don’t start the soaking process until you know you will be able to put them in the ground the next day (if you allow them to soak overnight.)

Tell Me More About Scarification

When dealing with extremely tough seeds, it’s a good idea to practice scarification before soaking them. Scarification is a process where the seeds are scraped to remove the outer layer.

However, you don’t scrape the seed to the point it becomes punctured. This will allow the outside of the seed to breakdown faster when soaking.

Again, this is an optional step, but it could help if you’re dealing with tough or wrinkled seeds which may be harder to breakdown.

If you’d like to practice scarification on your seeds, use a dull item such as a butter knife to scrape the outside of the seed without running the risk of puncturing the seed.

You now know why you should soak your seeds, which seeds are a good fit for soaking and which aren’t, how to soak seeds, and how to perform the scarification process.

Hopefully this will help you make an educated decision on whether soaking seeds is worth the added effort when planting your garden! 


Plus, it’s our hope by knowing more about different gardening techniques, you can find what works best for you and have a lush garden with a bountiful harvest this year and for years to come! 

Your Aggie Victory Garden, Getting Started!!

Your Aggie Victory Garden: 

Getting Started!

Forced to shelter in place, most of us are coming down with a bad case of cabin fever. Instead of worrying about the future and whether that scratchy throat you woke up with this morning is something serious, plant a Victory Garden!

Starting Out
It’s still a bit too cool and the weather remains unsettled to plant too much in the ground, but you can plant almost anything indoors, where it will grow into nice sized plants, ready to transplant in your garden bed later.

Some retailers that carry supplies remain open, and there are plenty of online retailers. AgWay, Tractor Supply, and hardware stores are still open! But you also can make do with what you have.

Got some extra paper drinking cups? Fill them with soil and plant a seed. Keep the soil moist and warm — covering with plastic wrap will help — until the seeds germinate and the plant sprouts. When it comes time to plant in the ground or a larger pot, plant the whole thing, cup and all. You can also use things such as recycled K-Cups!!


Quick Results
Planting radishes, baby arugula, baby spinach, baby kale, lettuce, green onions and bok choy for harvesting in about 30 days. You also can start a variety of plants (later season veggies like peppers and squash) and herbs indoors for planting outside later.

Outdoor gardens
If you have an empty flower bed or designated area for an outdoor garden — small is good when first starting out —

1)Pick a sunny spot. Summer veggies will need 6 to 8 hours of sun per day.

2)Before planting, add bagged compost to the planting area, at least 1 inch deep.

3) Make sure you have some kind of irrigation to the area; drip tubing is preferred.

4) Consider planting in grow bags or other large containers. Just make sure the containers are large enough — a 15 gallon pot is adequate for one large tomato plant, two to three pepper plants or one to two zucchini plants.

5)Don’t forget to start flower seedlings. Flowers not only add beauty to the garden but they add needed diversity and attract lots of beneficial insects. Good choices for easy-to-start flowers are zinnia, calendula, cosmos, nasturtium and sunflowers.

Interesting Idea.... 


Using Food Scraps!

Many of us stocked up on fresh vegetables, but in the days to come, it might be difficult to eat them all before they start to rot. No worries. Use them to grow more!!!

Here are some favorites that also are easy to grow:


Lettuce
Put lettuce leaves in a bowl with a little water, and set the bowl in an area that gets good sunlight. Mist the leaves a couple of times a week and once roots appear, transplant the rooted leaves in soil.


Celery
Cut the bottom of the stalk off and put it in a bowl with a little warm water. Put the bowl in direct sunlight. In a week or two, you’ll see leaves start to grow along the base. Transplant it into a pot of soil. You can continue to grow it indoors, or set the pot outside in a sunny spot.


Onions and Green Onions

Cut onion about an inch above the root base (that’s the fuzzy end of the onion), put it in a pot of soil, root end down, and cover lightly with soil. Place the pot in a sunny spot and wait for the onion to sprout and produce a bulb.

For green onions, cut the root ends off and put them in a glass with just enough water to cover them. Change the water every few days. In about a week, you’ll see new green onions appear. Snip off what you need and keep the others growing.


Ginger

Ginger is one of the easiest plants to grow from scraps. Plant a piece of ginger root in potting soil, making sure the buds are facing up. New shoots and roots will appear soon and you can use them for cooking. The ginger will continue to grow for quite some time.


Basil

Some people can’t live without a fresh supply of basil. Take one stem, at least 4 inches tall, and put it in a glass of water, keeping the leaves above the waterline. Put the glass in bright light, but not direct sun. Once the plant has developed a couple of inches of roots, you can plant it in soil.


Potatoes

You don’t even need whole potatoes to grow your own. You can cut up potatoes that are sprouting, making sure each chunk has one eye (sprout). However, you can also grow potatoes from peeling.

Cut the peels into 2-inch pieces, making sure there are two to three eyes on each piece. Let them sit overnight to dry out a bit and then plant them about 4-inches deep. Make sure the eyes are facing upward, and in a few weeks, you should see leaves emerging from the soil.


Sweet Potatoes

Sweet potatoes can be planted the same way regular potatoes are or you can turn them into houseplants. Suspend a sweet potato in shallow water using toothpicks. Roots will appear and then foliage. You can transplant the potato, or keep it in water and watch how quickly the greenery grows. Add water as needed.


Pineapple 

Always longed for your own pineapple plant? It’s easier than you think. Take the top of a pineapple and, like with the sweet potato, use toothpicks to suspend it slightly in a container of water. Keep the container in direct sunlight, or put it in a sunny spot on the deck, remembering to bring it in at night and to change the water every other day. Roots should form in about a week and at that time, you can transplant it into a pot of soil. You can grow it indoors or out.


Peppers


Collect seeds from peppers and plant them in potting soil. Keep moist and in direct sun until the seeds germinate. When the weather is warmer, plant in your garden. You can continue the crop year after year by saving some seeds from each harvest.


Goodluck, and remember to email me your pictures & stories/journals to post on here!!!

nforsyth@norfolkaggie.org

First Victory Garden Propaganda Poster Submission!

First Victory Garden Propaganda Poster Submission!

Submitted by:
Samantha Kraus, Grade 12!

Tuesday, March 24, 2020

Victory Garden Propaganda Poster Challenge

Victory Garden Propaganda Poster Challenge!

I challenge you all to re-create the propaganda posters of the early Victory Garden era!

If you have an artistic talent, and are bored out of your mind, consider recreating the classic posters of the early Victory Garden era! This will kick off our Aggie wide movement of growing our own Aggie COVID-19 Victory Gardens!

Challenge: 
Using inspiration and the style of the 1940s Victory Garden Propaganda posters,design and create a new poster for the Aggie's movement specifically! Achieve this by updating the vintage poster to create a more contemporary poster specifically geared towards the Aggie! Use your creativity! These can be digital (iPad drawing program) or non-digitally hand drawn. 

Please submit them to me for posting!! Send me an email if you are interested in this challenge!! 

Examples:


Aggie Victory Garden SURVEY Link!


ARE YOU INTERESTED IN JOINING THE VICTORY GARDEN CHALLENGE!? FILL OUT THIS LINK! 


Grow A Victory Garden: Combating America's Trials & Tribulations


Grow a Victory Garden: 
Combating America's Trials and Tribulations 

My challenge to the Aggie community is to grow a 2020 COVID-19 Victory Garden! If you have a plot of land where you can grow veggies and herbs, try it out! Use the motivation of this uncertain time, and channel the energy into something that is time consuming, challenging, but very satisfying and rewarding! Take a step back in time, appreciate the history of our country men and women before us who took pride in growing their own food, and a movement which united the country in trying times!!

If you would like to participate in this challenge, email me your progress and pictures and upload pictures and inspiration here!


Keep calm & read on....


History behind the Heroism:

During World War I, a severe food crisis emerged in Europe as agricultural workers were recruited into military service and farms were transformed into battlefields. As a result, the burden of feeding millions of starving people fell to the United States. In March of 1917, just weeks before the United States entered the war, Charles Lathrop Pack organized the National War Garden Commission to encourage Americans to contribute to the war effort by planting, fertilizing, harvesting, and storing their own fruits and vegetables so that more food could be exported to our allies. Citizens were urged to utilize all idle land that was not already engaged in agricultural production. This included school and company grounds, parks, backyards, or any vacant lots. 


Promoted through propaganda posters advocating that civilians "Sow the seeds of Victory!" by planting their own vegetables, the war garden movement (as it was originally known) was spread by word of mouth through numerous women's clubs, civic associations, and chambers of commerce, which actively encouraged participation in the campaign. 

Amateur gardeners were provided with instruction pamphlets on how, when and where to sow, and were offered suggestions as to the best crops to plant, along with tips on preventing disease and insect infestations. The endeavor was so well received that the government turned its attention to distributing canning and drying manuals to help people preserve their surplus crops. In addition to the appeal to men and women, the federal Bureau of Education initiated a U.S. School Garden Army (USSGA) to mobilize children to enlist as “soldiers of the soil.” As a result of these combined efforts, 3 million new garden plots were planted in 1917 and more than 5.2 million were cultivated in 1918, which generated an estimated 1.45 million quarts of canned fruits and vegetables. By the end of World War I, the campaign promoting home gardens—which by then were referred to as “victory gardens”—had dropped off, but many people continued to maintain them.


Shortly after the United States was drawn into the Second World War, victory gardens began to reemerge. Once again, commercial crops were diverted to the military overseas while transportation was redirected towards moving troops and munitions instead of food. With the introduction of food rationing in the United States in the spring of 1942, Americans had an even greater incentive to grow their own fruits and vegetables in whichever locations they could find: small flower boxes, apartment rooftops, backyards or deserted lots of any size. Amid protests from the Department of Agriculture, Eleanor Roosevelt even planted a victory garden on the White House lawn.

Some of the most popular produce grown included beans, beets, cabbage, carrots, kale, kohlrabi, lettuce, peas, tomatoes, turnips, squash and Swiss chard. Through the distribution of several million government-sponsored pamphlets, fledgling farmers were advised to maximize their garden’s productivity by practicing succession planting, and were encouraged to record the germination rates of seeds, along with any diseases or insects they may have encountered, in order to minimize waste and improve their garden’s output the following year.


Throughout both world wars, the Victory Garden campaign served as a successful means of boosting morale, expressing patriotism, safeguarding against food shortages on the home front, and easing the burden on the commercial farmers working arduously to feed troops and civilians overseas. In 1942, roughly 15 million families planted victory gardens; by 1944, an estimated 20 million victory gardens produced roughly 8 million tons of food—which was the equivalent of more than 40 percent of all the fresh fruits and vegetables consumed in the United States. Although the government’s promotion of victory gardens ended with the war, a renaissance movement has sprouted up in recent years in support of self-sufficiency and eating seasonally to improve health through local, organic farming and sustainable agriculture.

Stay tuned for the Poster Recreation Challenge!!!

Resources:Schumm, Laura. “America's Patriotic Victory Gardens.” History.com, A&E Television Networks, 29 May 2014, www.history.com/news/americas-patriotic-victory-gardens